Friday, August 28, 2015

Homemade Spaghetti Sauce Using Garden Fresh Tomatoes


I know fall is just around the corner, but our garden is pushing forth with some plentiful end of the season harvests. Do you remember earlier in the season when I told you that we had more tomato plants than we could fit in our garden? Well, Dave had planted the extras in whatever containers and buckets he could find and kept them on our deck. Guess what? They did amazingly well and have produced tomatoes all season, but when we returned from vacation they were literally overflowing with ripe fruit! My daughter and I tried to photograph the plants from several angles, but we couldn't get a picture that would adequately capture just how many ripe tomatoes these plants produced with this last yield, so here is a close up of what just one of the plants produced...


Crazy right? The tomatoes were small in size but luscious tasting. Here is what I picked from just the plants on the deck yesterday (and there are still some on the plants that aren't quite ripe yet)...


The plants in the garden also produced some of these smaller sized tomatoes, but the brandywine plants graced us with some large ones that filled the palm of your hand..
We've shared our bounty with neighbors, family and friends, but we still have a tremendous amount of tomatoes sitting in baskets on our counter and more that are ripening in the garden. Oh, and did I mention that our herb garden was overflowing as well, especially the basil? This photo was snapped several weeks ago, and the plants are even taller now, almost reaching my daughter's shoulders.
We made tons of garden salads, caprese salads, tomato sandwiches and BLT's, yet still piles of tomatoes and herbs remained. So, we decided to search for a sauce recipe to make. Most of the recipes we found on line however, used canned tomatoes and dried spices, and we wanted to use the plethora of fresh produce and herbs we had on hand before they rotted. We ultimately chose to modify the recipe we found HERE.  They had  a green pepper listed as an optional ingredient, but since we had some of those ripe in our garden as well, we decided to add one to our sauce, and it enhanced the flavor nicely. We also tossed in some fresh oregano, as we had an abundance of that too. We were so pleased with the end result, that I am making another batch today, and I thought I'd share our version of the recipe with you.

Garden Fresh Spaghetti Sauce

Ingredients:
-Approximately 15 fresh tomatoes, peeled chopped and blended in a food processor
-6 cloves of minced garlic
-10 Tbsp of chopped fresh basil
-2 Tbsp of cholpped fresh oregano
-2 tsp black pepper
-1 Tbsp sugar
-2 Tbsp olive oil
-1/3 cup fresh grated Parmesan cheese
 -1 green pepper finely chopped 

Instructions:
-Heat the oil in a  large pot over medium heat and add the minced garlic.
-Brown the garlic slightly, being careful not to burn it.
-Add the tomatoes, basil, oregano, black pepper, sugar and chopped green pepper, and bring to a boil, stiffing frequently.
-Reduce heat to low and simmer uncovered for 1 hour, stirring often.
-Cover the pot and continue to simmer for another 2 hours, stirring often.
-Add the grated cheese and simmer for another 10 minutes.


Wednesday, August 26, 2015

Preserving Summer Memories

Signs of fall, the upcoming change in seasons, and the start of the new school year are everywhere. Halloween decorations and costumes are on display in some stores and I've already read in several articles about how many days are left until Christmas. While autumn is one of my favorite times of year, and I adore the holiday season and all it has to offer, I am not quite ready to relinquish the last few weeks of summer just yet. While some plants in our vegetable garden are starting to wilt and dry up a little, overall it is still producing a large bounty for us several times a week. While acorns and even a few leaves have started to fall from some trees in our yard, the blooms on most of the other plants still look great, and butterflies, dragonflies, hummingbirds and lightning bugs are still frequent visitors to our backyard oasis. I am determined to enjoy these lasting signs of summer and relish these small blessings.


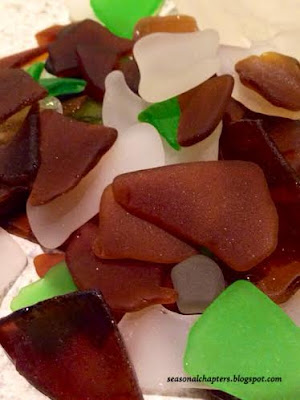
Since we just returned from a week long vacation at the beach in south Florida, I wanted to share something we created as a way hold on to these seasonal family memories. From the time my kids were young, they enjoyed collecting shells and searching the shoreline for other treasures. Even though they are young adults now, there is still something about the search for the perfect item and the competition of seeing who can find the best token that entices them. We were lucky enough to find a nice collection of sea glass, shells, and even shark teeth while snorkeling or while just walking on the beach this year, and my daughter decided that she wanted to make a bracelet as a souvenir of  one of our favorite family vacation spots. My son had created some beautiful jewelry out of sea glass for his girlfriend in the past, so Pam enlisted the help of her artistic older brother to help with this project.


 In addition to the found sea glass, they used wire and some charms that they obtained from A C Moore to create the bracelet.
 My daughter began by selecting the piece of sea glass that she wanted to use, as my son began fashioning the bangle style bracelet out of the wire. They used needle nose pliers to wrap some of the wire around the chosen piece of sea glass so that it could be attached to the bangle.
  
 Next the charms were added to the bangle...

 
Once the competition of finding the perfect beach treasure was over, I think their combined creative efforts resulted in a beautiful souvenir bracelet that will bring back memories of many great family vacations for years to come. Their finished project was actually as nice or even nicer than much of the jewelry we saw for sale in shops near the resort or at a local craft fair. The fact that they crafted it together and that it contained sea glass that they found themselves makes it even more special than a store bought souvenir,

Monday, August 24, 2015

Balance

I know it's been a while since I posted a new entry. Actually, my family and I were in Florida last week, and I had planned to get up early each day on vacation to create some posts and share some photos while everyone else was still asleep. However, there were some technical issues and I wasn't able to get that done. I woke up this morning with a very long "to do" list whirling around in my mind. There were many things that needed to get accomplished today, now that we are home and back into our normal hectic lifestyle. One of the things on my "to do list" was to write today's post as well as some future ones, in an effort to get into a more scheduled, predictable and professional blogging routine.
My husband is a baker for a retail food chain, and needs to be at work by 4:00 am on weekdays and 3:00 am on weekends, so our alarm goes off at a very early (almost obscene) hour. As I was pouring our coffee this morning, and trying to get back into the swing of being up so early, I clicked on my email and decided to glance at a few blogs as I packed Dave's lunch. I justified taking a few minutes to check in with my favorite bloggers by saying they would inspire me to get back into the routine of writing my own posts as soon as Dave left for work, and then I could attack the multitude of other things that needed to get accomplished today.  However, the newest post that Marian, aka Miss Mustard Seed, wrote stopped me in my tracks.  Her post was about finding balance, and it struck a chord with me. Dave and I are notorious for having crazy schedules and often taking on more than we should. I also see our oldest child getting into the same routine as he is a full time college student, works, and is starting his own business as well. Marian's words about balance, and making "priority lists" and not "to-do" lists hit home and reminded me of a book I read and this post that I wrote last year.
It's very easy to get caught up in a hectic lifestyle and not feeling like you are being productive unless you are doing more, accomplishing more, and accumulating more. There are so many blessings in life that we can miss if we don't take the time to slow down and appreciate them. Our health can suffer and we can pay a big price for committing to too much or for trying to be a perfectionist. So, before you begin your day, and your week, I encourage you to read today's post on the Miss Mustard Seed blog and consider the great advice Marian offers about setting limits, taking care of yourself, and prioritizing.  As you search for the ever elusive balance in life, I also want to again quote a passage from the book I mentioned in the post I wrote last year. I quoted this passage before, but Marian's post brought it to mind today, so I think it is worth repeating. It was written by James Patterson in the book Suzanne's Diary for Nicholas.... "Imagine life is a game in which you are juggling five balls. The balls are called work, family, health, friends and integrity. And you're keeping all of them in the air. But one day you finally come to understand that work is a rubber ball. If you drop it, it will bounce back. The other four balls -family, health, friends, integrity- are made of glass. If you drop one of these it will be irrevocably scuffed, nicked, perhaps even shattered. And once you truly understand the lesson of the five balls, you will have the beginnings of balance in your life." I'll leave you with that thought and the photo below from our vacation for now. I'll back later this week with some photos, some recipes and maybe even some projects as we get ready to move from one season into the next. Although this isn't the post I had planned to write today, after reading Marian's thoughts on balance, it seemed like a fitting way to ease out of vacation mode and back into reality. As you go about your day trying to juggle all of the balls in your life, please remember to take care of yourself and notice the beauty and blessings that surround you.


Monday, August 10, 2015

Zucchini Bread

The summer sunshine and warm weather bring a bounty of fresh fruits and vegetables this time of year.  When I was growing up, my mother would make several batches of zucchini bread each summer, utilizing the vegetables from my grandmother's garden. When I got married I continued the tradition of making this sweet summer treat for my own family. There are a lot of versions of zucchini bread  around, but this recipe that was given to us by a family friend, is the one that my husband and kids seem to like the best.  It freezes well, so you can make it often while zucchini is plentiful and have it available throughout the year. This may not be the healthiest way to eat your veggies, but it is certainly delicious... whether served with a warm cup of tea for breakfast or with a tall glass of milk for dessert!


Ingredients:
2 cups all purpose flour
2 tsp baking powder                                                              
1 tsp salt
2 tsp cinnamon
1 tsp baking soda
4 eggs
1 cup white sugar
1 cup brown sugar
1 cup of oil 
2 tsp vanilla
1  4 oz can crushed pineapple, well drained
2 cups of shredded zucchini

Directions:
Preheat oven to 350° 
Grease and flour 2 loaf pans OR 1 bundt pan
Thoroughly squeeze and drain shredded zucchini, and then dry with paper towels
Shift the flour, baking powder, salt, cinnamon and baking soda together into a large bowl
In a separate bowl, beat the eggs, sugars, vanilla and oil together, then combine with the dry ingredients, blending well.
Add in the pineapple and zucchini till well blended
Pour into prepared pans and bake for 45 minutes to 1 hour, or until a toothpick inserted in the center comes out clean.


Tuesday, August 4, 2015

Refrigerator Pickles

I ended yesterday's post with a photo of the day's yield from our garden...
While that post was about Jersey Tomatoes, I promised to talk about another abundant crop from our garden this week and share a recipe. As you can see from the photo, our cucumbers are producing like crazy! The plants seem to love the trellis that Dave built for them.

The plants are so thick and lush that you really have to search among the leaves or you could easily miss a cucumber hidden among the foliage.
However the real surprise is when you look underneath the trellis
Since we had such a large amount of cucumbers, we had to come up with many ways to use them. Of course we love to eat some plain or have them cut up in garden salads, as well as using them in the recipe for marinated cucumbers that I shared with you last month. 
My dad's family owned several acres of land in the Poconos when he was growing up, and they always had multiple gardens. I can remember going to visit my grandmother when I was little, and the shelves in her basement were continuously lined with rows and rows of mason jars filled with home canned produce from their gardens. They even had a root cellar near the barn. Sadly, I never learned to can, though I keep saying it is something I want to try. Until I attempt the canning procedure however, I found a really easy alternative for using our stash of cucumbers...Refrigerator Pickles! This method is simple and does not utilize the traditional canning method. From what I've read, most recipes made this way indicate that they can be kept for up to 3 months, but I have to admit that our stash lasted longer than that last year, and they were just fine. We've tried several refrigerator pickle recipes over the years, and today I am going to share one of our favorites. I obtained this version from Our Best Bites, and it looks like they got the original recipe from Ted Allen at Food Network Magazine.


Ingredients:
10 cloves of garlic, peeled and lightly smashed (I tend to add extra garlic, especially if the cloves are small)
2 cups white vigegar
2 tablespoons kosher salt
several sprigs fresh dill, unchopped (I use about 1 to 1 1/4 cups)
1 teaspoon celery seed
1 teaspoon coriander seed
1 teaspoon black peppercorns
cucumbers or other desired fresh vegetables

Instructions:
 In a medium saucepan, bring 4 cups of water to boil, reduce heat to a simmer and add the garlic. Cook for 5 minutes. Add the vinegar and salt, raise the heat and bring back to a boil, stirring until the salt dissolves. Remove from heat.

Evenly divide the dill among 2 1-quart canning jars. Divide the remaining spices between the jars. Using tongs or a slotted spoon, remove the garlic from the brine and evenly divide the cloves among the two jars. Pack each jar with cucumbers or other vegetables until each jar is tightly stuffed.

Bring the brine back to a boil and then pour it over the veggies to cover completely. Allow to cool. I initially could not fit all of the brine in the 2 jars, but as they were cooling, some settling occurred and I added more brine at that point. Once cooled, place the lids on the jars and refrigerate. They can be sampled within a few hours but have a more intense pickle flavor after a few days.
Some other refrigerator pickle recipes I have read suggest letting the brine cool prior to adding it to the jars. Although the flavor might take longer for the vegetables to absorb, it has been suggested that this method could result in a crunchier pickle. We found our pickles to be quite crunchy when we followed the recipe as outlined above, but I might try cooling the brine before adding it to the jars with the next batch I make to see if there is a noticeable difference.


Enjoy!!
Linking with:
The Enchanting Rose 
Coastal Charm 


Monday, August 3, 2015

Jersey Tomatoes

Happy Monday everyone! Hope you had a great weekend! The weather here was hot and humid and we spent much of the time tending to the vegetable garden. I know I've had a lot of posts about the various gardens and plants in our yard lately, but I just can't seem to help myself. After all, when I started this blog almost a year ago, my goals were to focus on finding the joy and inspiration that each season of the year, as well as each season of life can bring. The summer weather and lush greenery are beckoning me outdoors, and I want to share the fun and pretty surprises that keep popping up all over our yard with you. I promise that I do have some craft and DIY posts coming up though. However, today I want to focus on a delicious topic...Jersey tomatoes. 


Given its location, New Jersey is often thought of as a neighbor to New York City and all that Manhattan has to offer, but our fair state has a lot to be proud of in its own right. Of course, at this time of year, images of the Jersey shore are what come to mind for most people, and it is not uncommon to hear the songs of New Jersey natives Bruce Springsteen or JonBon Jovi  blaring from cars as everyone drives down the Parkway to a favorite shore town.
While it is true that our state has 130 miles of coastline spanning from Sandy Hook to Cape May, the nickname for New Jersey is "The Garden State". According to the official web site for the state of NJ, Abraham Browning of Camden is credited for giving the state the nickname when he spoke at the Philadelphia Centennial exhibition in 1876. He reportedly said that "Our Garden State is an immense barrel, filled with good things to eat and open at both ends, with Pennsylvania grabbing from one end and New Yorkers from the other." The name stuck ever since. While New Jersey ranks 5th in blueberry production and 3rd in cranberry production according to the state website, we are also well known for our fresh "Jersey tomatoes". Whether it is the climate in our area or the soil in our region, the conditions seem to be perfect for helping our backyard garden live up to the infamous nickname by producing a large amount of luscious summer Jersey tomatoes.
This year my husband planted 3 types of tomatoes from seed...4th of July, brandywine, and beefsteak. Like the name implies, the 4th of July plants produced the earliest tomatoes, and this year, it seems like the brandywine plants are producing the largest ones. We had more plants than we could fit in our backyard garden, and my husband just couldn't stand the thought of wasting any of them. So, in addition to what went in the garden, he filled every spare container and bucket he could find with the leftover seedlings and kept them on our deck.The plants didn't seem to mind the containers and they grew and grew and grew...
 They are thriving, and this weekend we counted well over 30 tomatoes on 3 different plants!
When we ran out of containers to put the leftover seedlings in, Dave got really creative and decided to plant one in an old tree stump in another area of the yard...
That plant seems to like its unique location as well...


In addition to producing large sized tomatoes, the brandywine seedlings  in the garden grew into some rather tall plants. My daughter Pam agreed to stand near some of them so you can get a perspective of just how tall they are. She is about 5'4", and you can clearly see just how far they tower above her...
Of course, the height of the plant means nothing if it doesn't produce, but these plants are producing. Some plants have MANY smaller size tomatoes...
While other plants have less volume but larger tomatoes. This is a photo of a tomato next to Pam's hand so you can get an idea of just how large it is growing...
However, tomatoes are not the only thing our garden is producing abundantly, but since this post is already quite long, we'll save that discussion and a fun recipe for later this week.