Wednesday, December 31, 2014

Hot Wing Dip

As promised I am going to share another dip recipe with you today. It's great for the New Year's Eve snack table or to have while watching all of those football games tomorrow. My family has made this recipe for years. It is always well received when we share it, so today I am sharing it with you. The recipe requires some cooked chicken. When making this I often use the Purdue Short Cuts Chicken, but if you plan ahead you can make chicken for dinner the day before you plan to make this recipe and just cook a little extra to save for when you make the dip. I've also placed leftover cooked chicken from dinners in the freezer to have available for when I want to make this recipe.
Hot Wing Dip

Ingredients:
2 cups shredded cooked chicken
1 8 oz package cream cheese                                                    
2 cups shredded cheddar cheese
1 cup ranch dressing
1/2 cup Louisiana style hot sauce

In a 3 quart slow cooker combine all ingredients, cover and cook on low for 1 hour or until all of the cheeses melt.

That's it...super simple and really tasty. Serve it with multi grain chips, crackers, celery and other veggies. We usually double the recipe when we are having a party and there is rarely any left over (and someone always asks for the recipe).

Linking with:
Best DIY Projects and Recipe Party at The 36th Avenue

Tuesday, December 30, 2014

Chile Cheese Dip

I hope everyone had a great Christmas!  Our holiday was wonderful and we enjoyed spending the day together with lots of family time...it doesn't get any better than that. Now as 2014 is drawing to an end, it's time to think about New Year's Eve. Ever since our children were little, we usually spent the evening with a few friends either at their house or ours, with a true kid friendly celebration. This year we are having the celebration at our home so I've been thinking about the finger foods I want to have readily available.Since there will be teenagers here I know we'll need lots of munchies. My son's girlfriend recently shared a very simple dip recipe that her family has made for years. This recipe was given to her family by one of her sister's friends and has been a hit at her house ever since. It couldn't be easier to prepare and  it appeals to many. What could be better to add to a list of snacks for the New year's Eve gathering than a quick, simple tasty dip recipe that appeals to kids, teenagers and adults? So here you are...

Chile Cheese Dip

Ingredients:                                                                                   
                                                                  
1 8 oz package of cream cheese
1 can of chile (we used Hormel Chile with no beans)
1 1/2 cups of grated cheddar cheese (more or less to taste)

Spread the cream cheese into the bottom of a pie dish and then spread the entire can of chile over that. Top with the shredded cheddar cheese. Place in the microwave for  about 2 minutes or until the cheddar is melted and the chile is warmed. Allow it to cool slightly before serving with multi grain chips.


I know....this is so easy that it really doesn't qualify as a recipe. But if you are having a house full of teenagers or hungry guests over for New Year's Eve, it can be the perfect addition to your snack table because it doesn't take a lot of time or effort, and will allow you to spend more time socializing. I have another fun and tasty dip recipe that I am going to share with you tomorrow. 

Have a wonderful day!


Monday, December 15, 2014

The Christmas Box by Richard Paul Evans

     The Christmas Box was originally written and self published by the author as a gift for some family members. He wrote the story when he was a young father of two daughters with the hope that one day they would understand the joy they brought to him.  After receiving requests for more copies of the story, Richard Paul Evans submitted his work to a local  publisher but it was promptly rejected. He then self published the story that would eventually climb to the top of the word's bestseller lists, gain national  media attention, and ultimately become part of a trilogy. In the 20th anniversary edition, there is an introduction by the author in which he tells how the book came to be, and the impact it has had on his life as well as others. He also tells of three miracles that he believes came about because of the book.
     This is a short, touching story that can easily be read in one sitting, yet the message it instills will remain with you long after you turn the last page.  The narrator, Richard and his wife Keri, accept a position helping to care for a lonely widow (Mary Parkin) and move into her spacious Victorian home with their daughter Jenna.  Mary becomes concerned with Richard's desire for success and the way he seems to be placing his career as a priority over his family. As the holidays draw near, she asks him to consider what the first Christmas gift was, and becomes angered when she feels Richard does not give the question ample thought or consideration. Eventually, with the help of some letters he finds in an old box in the attic, as well as the insight of a neighbor that has known Mary for almost all of his life, Richard is finally able to understand the lesson Mary is trying to teach him.The first gift of Christmas was love...a parent's love for their child. This is manifested by the Christmas story, when God sent his beloved son to earth to care for all of his children.
     Ultimately Richard realizes that Mary gave him a sacred and precious gift as well...the gift of appreciating and relishing his daughter's fleeting childhood. He finally understands that while Jenna would be his little girl forever in his heart, someday she would be grown and gone, and he would only be left with the memory of her giggles and secrets.
     I urge you to take some time during this beautiful holiday season to grab a cup of hot chocolate and curl up in front of the fireplace for an evening with this book. You may even want to make reading this story an annual Christmas tradition as I do. Though this time of year can be hectic, The Christmas Box can serve as a reminder of what Christmas is truly about and that family should be cherished. I hope you are all enjoying the magic of this holiday season and that you have the joy of experiencing it's wonder through the eyes of a child.


Friday, December 5, 2014

Transforming An Old Rocking Chair

 I know it's been a while since I posted, but we 
have been having some technical difficulties with our computer, so I apologize. I hope everyone had a great Thanksgiving. Our holiday was wonderful and we enjoyed spending the day together. We woke up to this beautiful scene in our yard...


It was a really heavy snow and we actually lost power for about 10 minutes while the turkey was in the oven. Luckily, we were part of the lucky group that got our power restored quickly and we were able to continue preparing the Thanksgiving feast without any incident. From the stories we've heard however, others were not so lucky and they were not able to prepare their holiday dinner. I guess we can just add our restored power to our long list of things to be thankful for this year!
Today I want to share a recent project I completed. This is an old rocking chair that we purchased many years ago from the people who owned our home before us. It is a heavy and very sturdy rocker, but as you can see, it was quite scratched and had certainly seen better days...


 It also had a lot of gold paint that I was not fond of...
 

So, this was the perfect opportunity to try out another color from the Miss Mustard Seed milk paint line. Since I wasn't sure which room we would ultimately use this rocker in (it's had many homes throughout our house over the years), I decided to stick with a neutral color that would work in various settings. Trophy was the winner for this project. It is the deep gray in this milk paint line, and I have been looking for the perfect piece to try it on.
When using milk paint, it is often easy to get concerned after your first coat of paint. This product is not like latex paint, and the coverage is very different from other paints you may have worked with. There is sometimes an "ugly phase" to the project, and I've learned not to panic or get too upset with this phase...

   I just take a deep breath and wait for the first coat of paint to dry. Luckily milk paint dries rather quickly, as I usually can't wait to get the next coat of paint on to prove to myself (and my family) that it really was a good idea to paint another old piece of furniture.
 Patience and a little faith really pay off however...

After the second coat of paint, I finished it with a coat of hemp oil, which really enhanced the color. The waxes in the Miss Mustard Seed line are great to work with, but I have to admit that I really love working with the hemp oil.
I  think it looks like a completely different piece of furniture don't you? This might be one of the  more dramatic "before vs after" projects I've done yet.


Tuesday, November 25, 2014

Adorable Acorn Treats


This is a super easy treat that  you can make as a snack for your family, or as little gifts for friends, co-workers or teachers as a way to say thank you for all that they do. You could also place a jar of them in a basket with some hot chocolate mix and some flavored coffee and tea bags for a family friendly hostess gift. I've already told you that fall is my favorite time of year, and I have to add that I love acorns. I'm not sure what it is about them but I think they are so cute and I always use them as part of my autumn decorating. So, it stands to reason that these adorable treats just had to get added to my list of seasonal recipes...not that they can really be called a "recipe". I first saw these on the Our Best Bites blog a few years ago and I knew I had to make them. Sine that time I've seen them on other blogs and most recently on the cover of a magazine. In case you haven't seen them, let me show you what I am talking about.... 

  To assemble them you just need a  few ingredients:
  Nutter Butter Bites cookies
 Some ready made cookie frosting
 Hershey kisses
Minaure chocolate chips
You then simply use the frosting to attach a Hershey kiss to one side of the cookie and a mini chocolate chip to the other.


Once the frosting has set, you can decide how you want to serve or present your adorable treats. I love using wide mouth mason jars. This year I used a circle of fabric and placed it under the jar rim and then tied some raffia around it. You could also over fill the jars and leave the lid off. In the past my friend made the most adorable teachers gifts by tying some seasonal ribbon in a large bow around the jar and attaching a cute thank you tag. Creating the presentation is half the fun.


Thursday, November 20, 2014

Turkey Chile

This is a great recipe that can offer comfort and warmth as the weather starts to cool. I would recommend doubling the amounts as the extras can easily be frozen and it tastes even better as leftovers because the flavors have more time to meld together.

Turkey Chile
Ingredients:
2  cans of red kidney beans, drained and rinsed
1 Tbsp olive oil
1 large onion, sliced
1 green bell pepper, chopped
1 pound ground turkey
1 can mild green chile peppers                                               

1 can diced tomatoes
1 can tomato sauce
1 Tbsp chili powder
1 1/2 tsp salt
pinch of cayenne pepper (adjust amount to your liking)
2 Tbsp grated cheddar cheese
extra grated cheddar cheese to top when served

Brown the ground turkey, pepper and onion in olive oil. Once browned, add all ingredients except the kidney beans and cheddar cheese to a large pot and cook on low for 1 1/2 hours, stirring frequently.

After 1 1/2 hours add the kidney beans and 2 Tbsp of  cheddar cheese and cook for an additional hour, again stirring frequently. You can add additional grated cheese or a small amount of olive oil during this time to enhance the texture to your liking.

Serve with additional grated cheddar, rice and some multigrain chips.

Linking with:


Tuesday, November 18, 2014

Bringing New Life to a Family Heirloom

      We have a drop leaf table that was given to us by my in laws. It is a very study piece of furniture that had been made by my husband's grandfather, but truth be told, it had seen better days. The finish on the top of the table was worn and had some water stains. It also had a long crack that extended along most of the table top.  Although it showed damage from years of use, I was always hesitant to do anything to the finish since it was made by Dave's grandfather. I just didn't feel right about changing a family heirloom. After refinishing several other pieces of furniture however, and seeing how they could be brought back to their former beauty, I decided to give the long neglected table the attention it deserved. Here is the "before" photo of the table...

 Our first job was to fill the crack with wood filler and then sand the top. As soon as we began, all feelings of doubt I had had about doing anything to the table diminished. It is  a treasured piece that had been in Dave's family for years, and although we were going to change it's appearance, we were going to enhance it's beauty, not diminish the sentimental value. Here's a look at the table with the leaves extended, the crack repaired, and the top partially sanded...
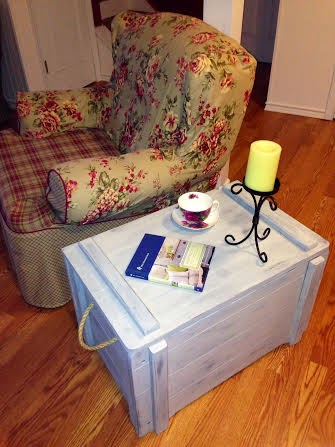
After a much deliberation, I decided to paint it with Miss Mustard Seed milk paint in a color she calls linen. Linen is another neutral color of this milk paint brand, but it is considered the cream color of the three options, whereas grain sack (which is the top color I used when refinishing the toy chest) is described as" a chameleon color that looks different depending on what is around it". The grain sack color can look white or sometimes gray, but the linen color has warm undertones and is more of a creamy white. There is also a third neutral that is called ironstone, and it is a cooler off-white that is considered the closest color to a pure white in this line. I am having fun experimenting with all of the options that are available.
      I ended up using four coats of linen on this table, because I was painting over such a dark stain color with a light colored paint. I did not use the bonding agent this time, and the paint had minimal chipping occur on the table top since it had been sanded prior to painting. However chipping did happen on the areas that I did not do any prep work to.  I liked the distressed look that occurred as I wanted to maintain the aged appearance of the table. Unfortunately, Dave wasn't crazy with the look. We were hoping to have some chipping happen, as we wanted to pay homage to the history of the piece, but in the end he wasn't thrilled with the sharp contrast between the two colors... 

 
To minimize the difference between the original dark stain and the light paint color, I applied a finishing coat of hemp oil over the entire table, but I  added a coat of white wax over the ares that had some chipping occur. This gave the stained base color more of a white washed effect and softened the contrast slightly.
 We really ended up liking how the finished piece turned out. We currently have it against the back of a love seat separating the living room from our dining room. For now it acts as a "sofa table" but is readily available if we need to extend the leaves and use it for extra seating when family and friends come to visit. I am really glad I decided to take the plunge and redo this heirloom piece of furniture. It still has an authentic aged appearance, but the chipped shabby chic look is much nicer than the old worn and water stained finish that it formerly had. Now I love having it an area where it can be appreciated and utilized, whereas before I felt the need to have it out of the way and the top always covered to hide the damaged area. I've changed the items I have displayed on the table a few times since I finished painting it, but the one thing that I have consistently kept on it is a tatted doily that my grandmother made. Tatting isn't a craft that I see a lot of any more, and I wish I had had my grandmother teach me how to do it. I especially love that both the doily and table can be displayed together. Although my children never got to know either of these great grandparents, having these items in our home, shows them what skilled artisans some of their ancestors were.

 
By the way, I am linking this project up to the Milk Paint Masterpiece Monday party at the Miss Mustard Seed Milk Paint Blog. I am really learning to enjoy using this line of milk paint and Marian's two blog sites are always full of inspiring ideas..
I am also linking up with Angie from Knick of Time, to join her and some of her blogging friends for their Vintage Inspiration Party...be sure to stop by. 
Please visit My Salvaged Treasures as I will be joining their link party too.
Be sure to stop by the Get Your DIY On Link Party hosted by Abby at Just A Girl And Her Blog and 4 other great bloggers, as I will be joining that party as well. Their monthly parties are always full of inspirational ideas.


Friday, November 14, 2014

Seasonal Changes

     So far November has been a little odd here in Northwestern NJ. There have been several warmer than usual days that have resulted in a few surprises...like some jellybean tomatoes ripening on a plant that we had in a bucket on our deck...the plant was dry and brown but the tomatoes were red and lush...


 If newly ripened tomatoes in November were not a unique enough treat, one of our rose bushes continued to bless us with autumn buds...                     


The red tomatoes and the red roses may have been a little unusual for this time of year, but the blazing red colors of the Japanese red maple trees in our yard were right in season


 We weren't the only ones enjoying the benefits of a warm autumn....my friend's garden yielded some late season roses and hydrangeas that she used to adorn her home...


 However, this morning we woke to the sparkle of white snow and clear crystals coating the landscape...


This sprinkling of snow may finally be the end of our unseasonably late gift of vegetables and blooms, but it also represents a sign of the glitter and beauty that the next season will bestow.


Thursday, November 13, 2014

Giovanni's Light by Phyllis Theroux....The Story of a Town Where Time Stopped for Christmas

     Since we are about to celebrate Thanksgiving and will be headed into the Christmas season soon, I wanted to choose a book for this month's selection that would reflect the meaning of this time of year and perhaps provide some inspiration and opportunity for reflection. Part of my decorating for the holidays includes bringing out and displaying some seasonal books around our home. While many of these books are classics or children's stories that we shared with our kids when they were younger, over the years I have also included some newer stories that I had discovered as well. They are books that remind us to focus on the true meaning of the season.  Giovanni's Light by Phyllis Theroux is one of the books I choose to read each year and put on display as part of our holiday decor. In this day and age it is so common to become frenzied by a harried pace and endless "to do" lists. This book is a reminder of the importance of taking the time to slow down and appreciate each moment. The story is short enough to be read in one sitting, but it's message is something that will stay with you long after you close the book. The story takes place in Ryland Falls, a quaint, quiet town that is forced to come to a halt when a blizzard blankets everything with snow just before Christmas. Families and the community are forced to come together and slow down as they take notice of the little things...the things that can really mean the most. The author states it best by writing that the townspeople are reminded "of what they had forgotten, or never knew - that life can be sad and beautiful, lonely and dull, but it is never unimportant" and that they are "encouraged to look long enough to see it all." The characters of the story, and thereby the reader, are forced to examine  their perspective on what is really important, and ultimately realize that time is a precious gift that should not be wasted. A paragraph towards the end of the book sums up the lesson well..."Most of the world quickens its step the closer it gets to Christmas. In Ryland Falls, the opposite is true. People become more peaceful, their steps become more measured, as if they don't want to disturb anything important that is getting ready to happen. Or not happen." So as the Thanksgiving holiday approaches, take a moment to give thanks for the love of family, the support of community, the kindness of strangers and most importantly, the gift of time. I encourage you to sit down with a warm cup of cocoa and allow yourself to get snowed in in Ryland Falls.
  

Monday, November 10, 2014

Shepherd's Pie

     The basis for this recipe was given to me by a friend. My family and I made some minor adjustments and now it is a recipe that we turn to on a regular basis. The nice thing about this dish is that you can make and assemble it in advance and then heat in the oven later. I often prepare it on the weekend and store it in the fridge, then pop it in the oven when I get home from work. The leftovers can be reheated as well. It's a filling, family friendly recipe that is great to have in your collection.

Ingredients
2 lbs of turkey sausage, removed from the casing (we use hot sausage, but you can use sweet, or 1 lb of  each depending on your family's preference. It is however, important to use a quality sausage)       

1.5 lbs of ground turkey
1 green pepper, chopped
1 onion, chopped
3 stalks of celery, chopped
small amount of olive oil to saute the vegetables in       

1 Tbsp minced garlic
5 lbs of mashed potatoes
2 12 oz cans of tomato paste
1  bag of frozen corn
2 1/2 cups of shredded cheddar cheese


Preheat oven to 350 degrees

Prepare the mashed potatoes (you can prepare them however your family prefers. I add some butter, and a small amount of salt and milk when making mine. It is best if you have a somewhat firm mashed consistency as it will be easier when you cut and serve the meal later).

Brown the meat, drain and set aside.

Saute the onion, pepper and celery in olive oil until tender. Add the garlic and saute for 2 minutes longer.

Stir the onion, pepper, celery and garlic into the browned meat. Add the tomato paste and mix well.

Spread the meat mixture into the bottom of a 10x15 casserole dish. Sprinkle the frozen corn kernels on top of the meat. Spread the mashed potatoes over the entire casserole and then sprinkle the shredded cheese on top.

Bake uncovered for 45 minutes or until completely heated through.

Enjoy!


Friday, November 7, 2014

Toy Chest Becomes an End Table


      Today I want to share a project with you that has been a long time in the making. My parents had given my son a beautiful, solid, and well made wooden toy chest for his first birthday. My original intent was to stain it, but it was immediately put into use holding many of David's toys. The staining project was put on hold. Over the years I thought about painting instead of staining it, but since I couldn't decide on a color because the toy box was utilized in various rooms, it remained in it's unfinished raw wood state. It also acquired it's share of nicks and scratches along the way, as it was put to good use by both of our children.
     As the kids outgrew the need for a toy box, the piece of furniture was moved to the basement, again with the intent that some day I would finish it.  Well, my new found love of milk paint and the variety of ways it can be used, motivated me to pull out the long forgotten toy chest and finally give it the much anticipated makeover it deserved.


       After mulling over all of my color options, I decided to try something a little different from anything I had done up until this point. I chose to use trophy, which is a rich gray color, as a base coat. Since the chest was unfinished raw wood, the paint would soak into the wood and would not chip, even without the use of the bonding agent. After the coat of trophy was dry, I used the Miss Mustard Seed wax puck to create areas of resistance for the next layer of paint. The wax puck is a round disc of wax that you rub onto your wood pieces, causing the next layer of paint to resist adhering. I then painted 2 coats of grain sack, which is an off white color that is described on the MMS Milk Paint site as a "chameleon color, meaning it looks different depending on what is around it." At this point I used a fine grit sandpaper to gently remove some of the grain sack color where the wax puck had been rubbed over the chest. This allowed the gray color to show through, rather than sanding it down completely to the raw wood. I finished it with  a coat of hemp oil which really enhanced the tones. The completed piece had a weathered look, and with the rope handles that were original to the toy chest, it had a rustic, almost coastal feel.
     
      Unfortunately we don't have a guest room in our house, so when my parents or other family members visit, we end up utilizing an air mattress in the family room to create some additional sleeping space. The refinished toy box is big enough to store the deflated air mattress and linens when not in use. It keeps these items out of sight, and serves as a unique end table with hidden storage. It looks great next to a chair that is in front of our fireplace, and creates a cozy spot to read and sip some tea on chilly evenings.    
 
      I've redone a few other pieces of furniture with milk paint and I'll be sharing those with you soon. It is hard to choose which one I like the most, as I'm pleased with how they all turned out. I must admit however, that this piece is definitely among my favorites. Not bad for a project that was almost 20 years in the making. Some things are truly worth waiting for!

 By the way, I'm linking this project up with the Pretty Preppy Party this month that is hosted by some great bloggers. Be sure to check out Julie's blog at Less-Than-Perfect Life of Bliss.  
She has a really inspirational site with lots of great ideas!
I'm also linking up  with Milkpaint Masterpiece Monday on the Miss Mustard Seed Milk Paint Blog  and Furniture Feature Friday on the main Miss Mustard Seed blog. You know how much I enjoy using the MMS Milkpaint products and her blogs have been among my favorites for a long time.
I am also linking up with Finding Silver Pennies. Danielle has a fun blog full of ideas and hosts a great Sunday link party, so grab a cup of tea and go stop by for a visit. And be sure to join Becky at Beyond the Picket Fence for the Vintage Inspiration Party she hosts with 3 other blogs as I will be linking up there as well.
Please come check out the great projects at My Salvaged Treasures as I will be displaying this project there as well.
Please Stop by the Get Your DIY On Blog Party hosted by Mandy at The Hankful House and 4 other great bloggers.